Create your first website with open bi CMS
This tutorial will teach you how to create a simple “Hello World” website with the open bi CMS. It follows the instructions for setting up a CMS as described in Create a new CMS.
Create the design
This step has already been described here: Create a CMS Master Page.
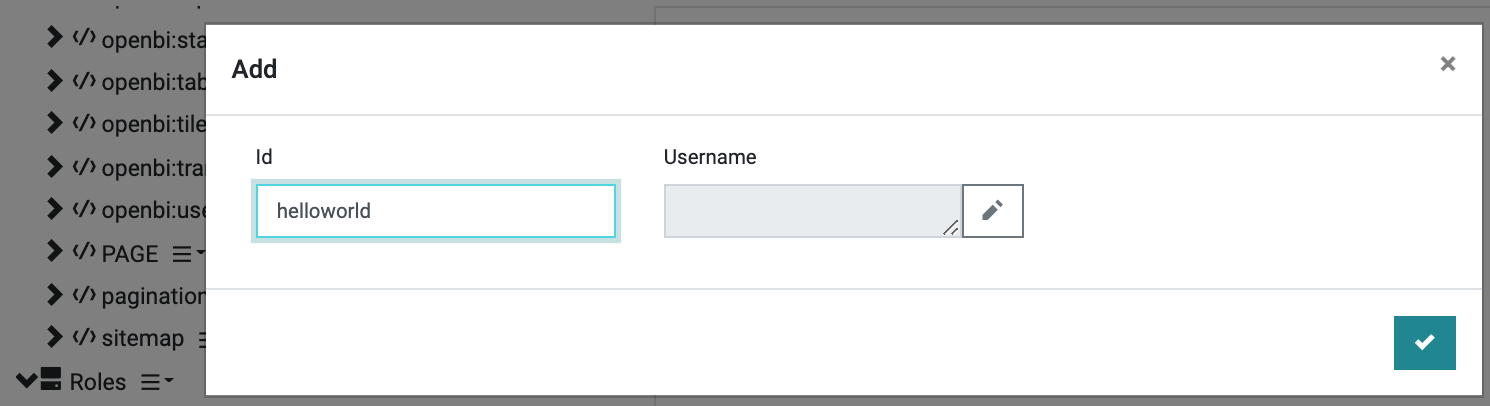
In the open bi Configurator, we navigate to CMS, open the CMS Item Templates node and then the PAGE node. We click on the context icon next to the node and choose Add. We only have to maintain the Id "helloworld":
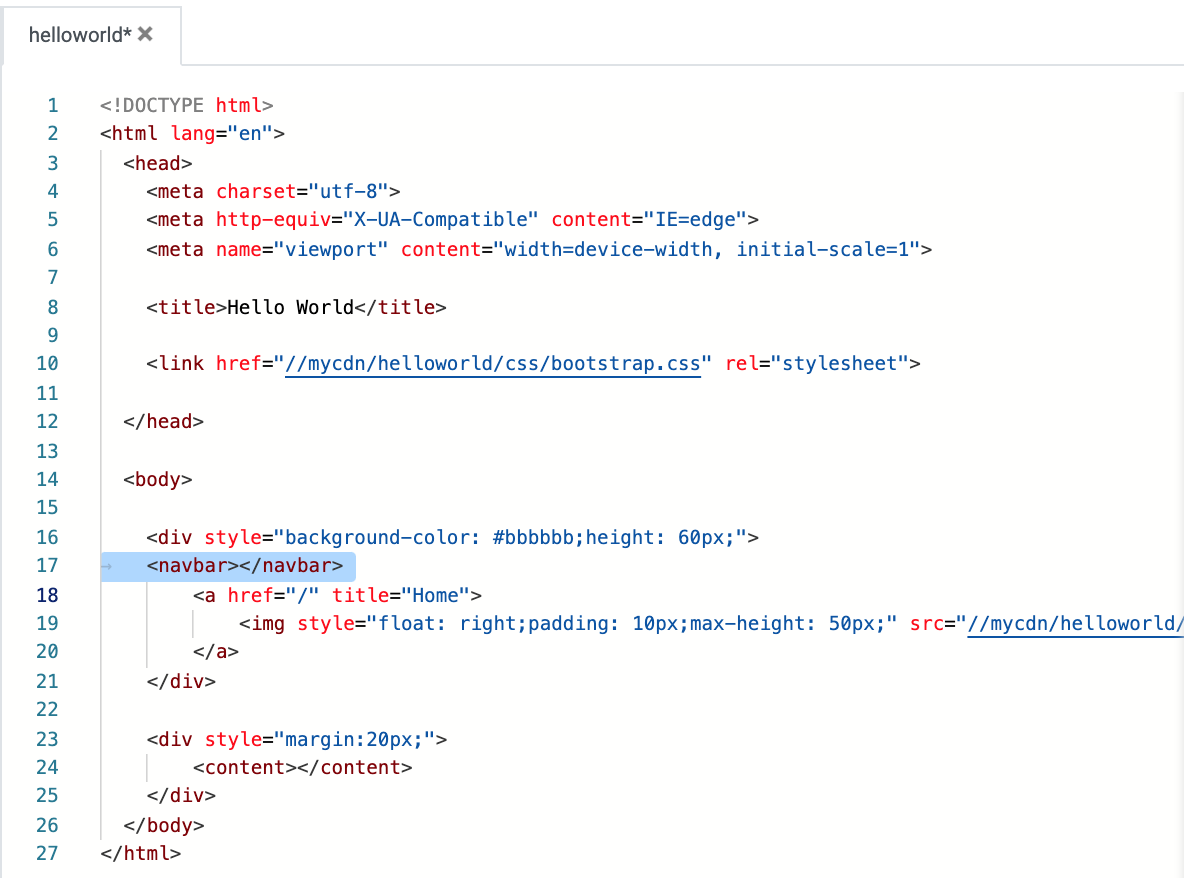
Then we double click on the new "helloword" subnode to maintain the HTML:
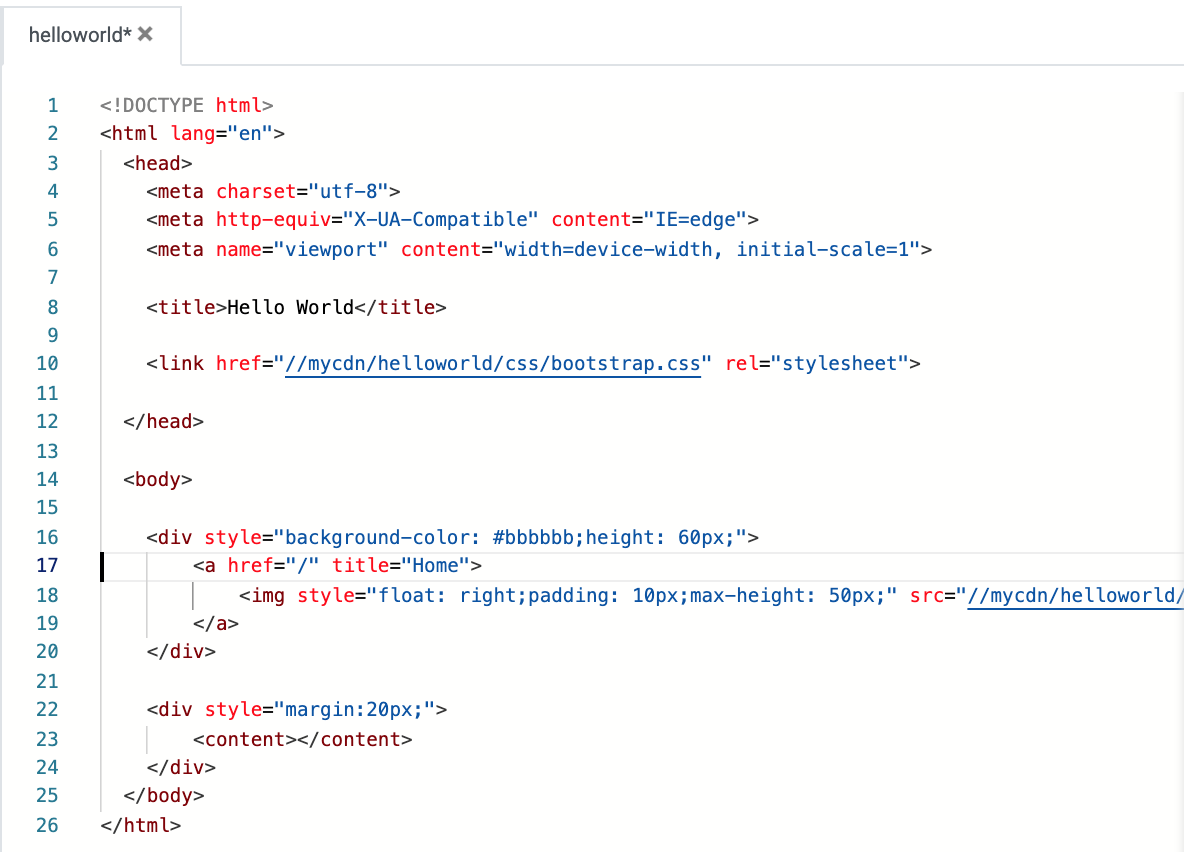
This is the source code that we used for the "helloworld" website:
<!DOCTYPE html>
<html lang="en">
  <head>
    <meta charset="utf-8">
    <meta http-equiv="X-UA-Compatible" content="IE=edge">
    <meta name="viewport" content="width=device-width, initial-scale=1">

    <title>Hello World</title>

    <link href="//mycdn/helloworld/css/bootstrap.css" rel="stylesheet">

  </head>

  <body>

    <div style="background-color: #bbbbbb;height: 60px;">
        <a href="/" title="Home">
            <img style="float: right;padding: 10px;max-height: 50px;" src="//mycdn/helloworld/img/bi_logo_weiss.png" />
        </a>
    </div>

    <div style="margin:20px;">
        <content></content>
    </div>
  </body>
</html>
Set up the structure
This step has already been described here: Create a Role.
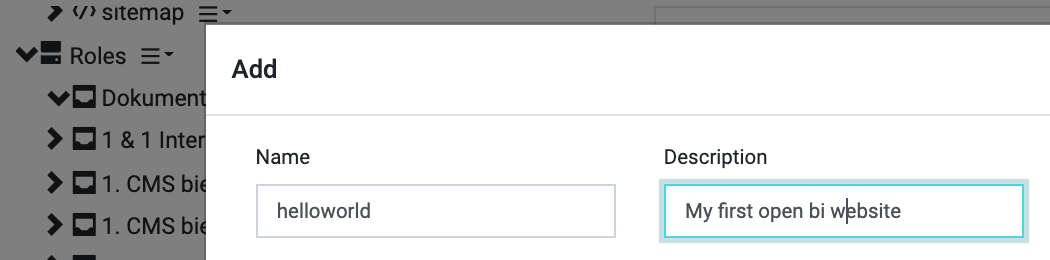
For our "Hello World" website, we create a role named "helloword":
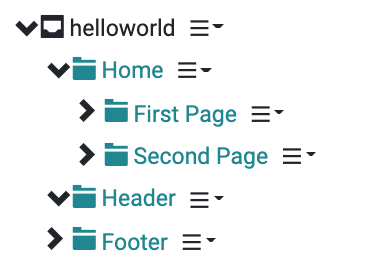
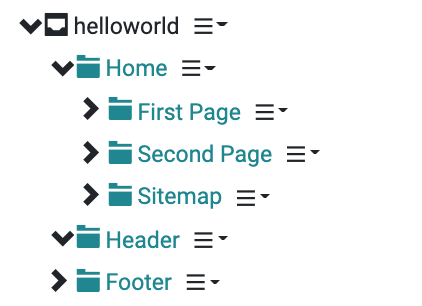
For the role we create the following structure:
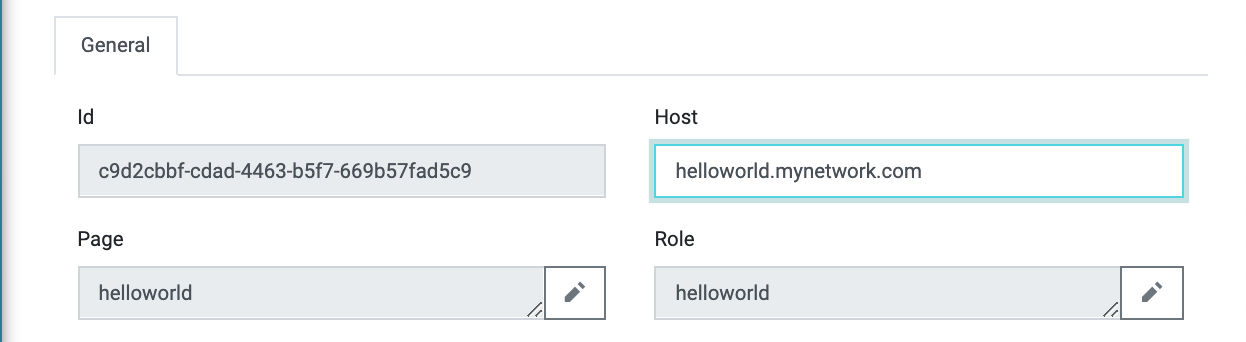
Then we create our own host header, as described in Create a Host Header. We choose the CMS Master Page and the Role that we have just created:
Add the content
Now we can double click on each folder to edit the page content. For this tutorial, we are using the HTML editor of the open bi Web Configurator.
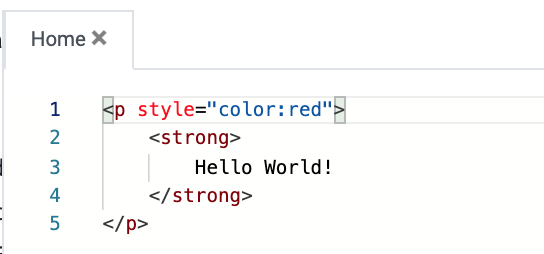
For the content page we include a “Hello World” in red and bold:
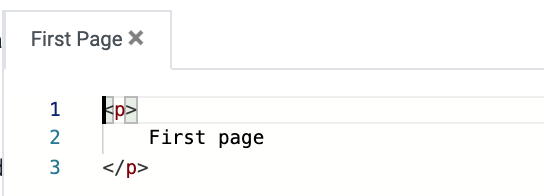
For the other pages, we add a simple text, for example:
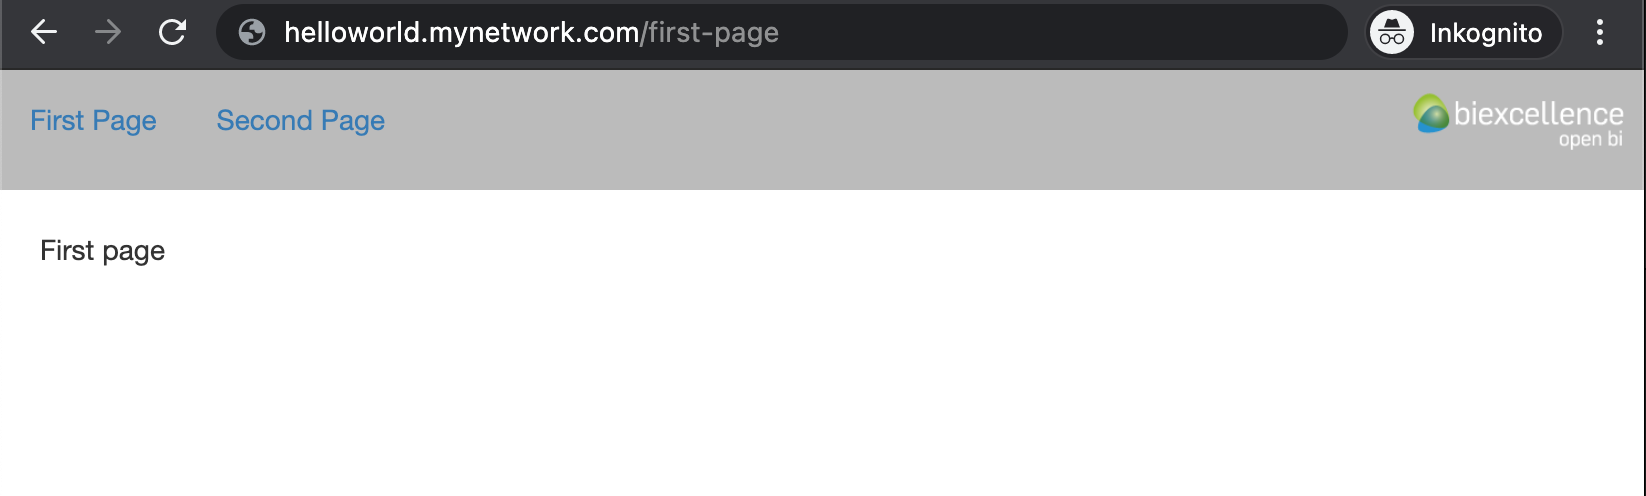
Now it is the first time to test our website. Following the host header definition, I call the website helloworld.mynetwork.com and receive the following result:
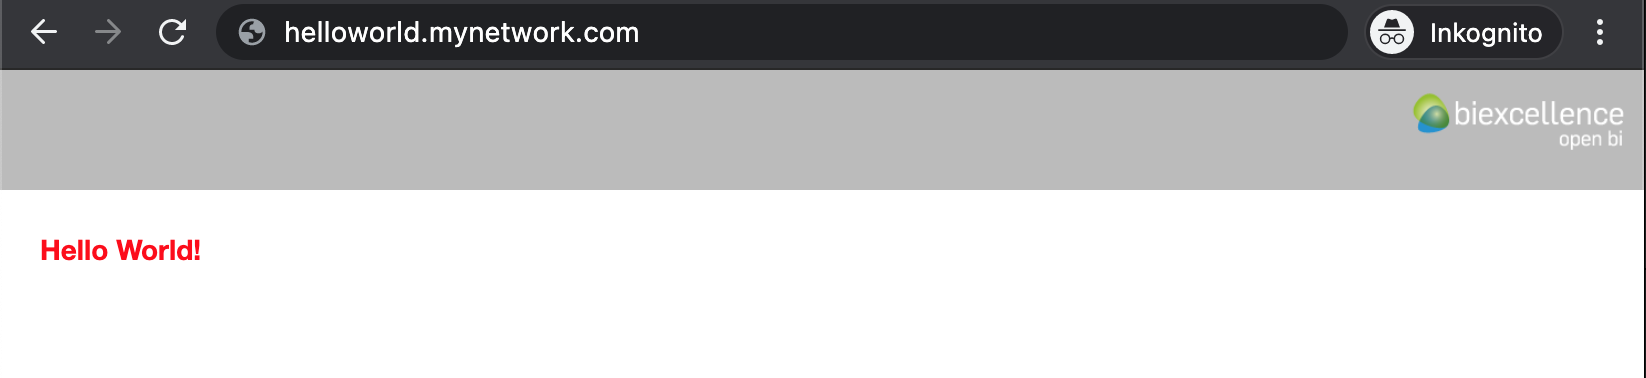
You can see that open bi merged the CMS Master Page with the HTML that has been defined in the role tree.
Add the navigation
It is pretty obvious that the website is missing navigation possibilities. The open bi CMS provides an HTML item to automatically include a navigation bar:
<navbar></navbar>
In our example, we add it simply to the header:
And the result is as follows:
Add the sitemap
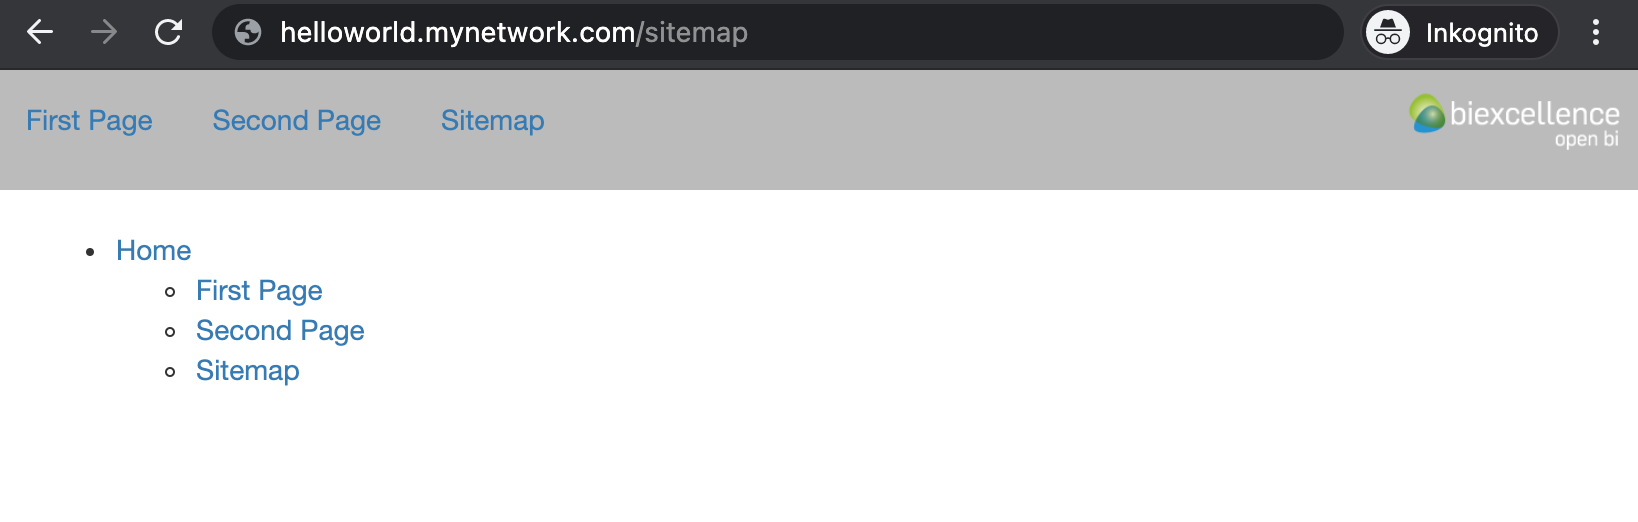
The open bi CMS provides an HTML item to automatically render the sitemap:
<sitemap></sitemap>
In our example, we add a new page...
... and add the HTML Item to it:

And the result is as follows:
Of course the website is neither styled nor complex. With open bi CMS, you of course can:
- Add custom CSS
- Change the rendering of the HTML Items
- Use additional HTML items, e.g. for logon, data visualization etc.
These topics are described in other Web Development tutorials.
